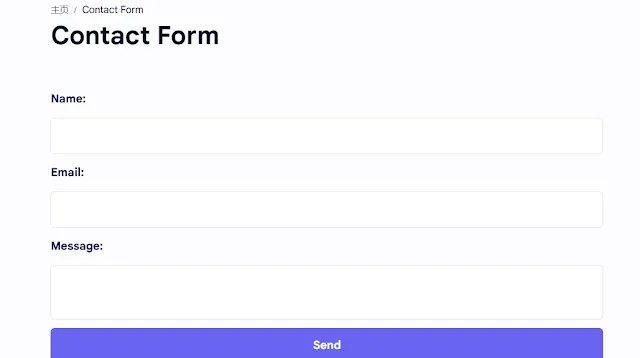
Google blogger 有内置的Contact form
google blogger 内置的组需要使用的只能以组件方式添加,如果需要在特定页面展示的话,需要修改代码。很是复杂,针对不同模板。
基于此,用一种在所有博客上通用的添加方式。
将表单添加到您的 Blogger 网站
登录您的 Blogger 帐户并转到您网站的仪表板。
导航到您想要添加联系表单或创建新页面的页面。
在 Blogger 编辑器中,切换到 HTML 模式。
复制以下 HTML 代码并将其粘贴到 HTML 编辑器中
 <div class="my-contact-form">
   <form
     action="https://formsubmit.co/youremail@email.com"
     method="POST"
     id="contact-form"
   >
     <div>
       <label class="my-contact-form-label" for="name">Name:</label>
       <input class="my-contact-form-input" type="text" id="name" name="name" required />
     </div>
     <div>
       <label class="my-contact-form-label" for="email">Email:</label>
       <input class="my-contact-form-input" type="email" id="email" name="email" required />
     </div>
     <div>
       <label class="my-contact-form-label" for="message">Message:</label>
       <textarea class="my-contact-form-input" id="message" name="message" required></textarea>
     </div>
     <input type="hidden" name="_captcha" value="false" />
     <input type="hidden" name="_template" value="table" />
     <input
       type="hidden"
       name="_next"
       value="https://www.blogbrackets.com/p/thank-you.html"
     />
     <button class="my-contact-form-btn" type="submit">Send</button>
   </form>
</div>请将youremail@email.com 替换为您的邮箱地址。并将 https://www.blogbrackets.com/p/thank-you.html 中的网址替换为您的页面网址。下面我告诉您如何创建此页面。
添加修饰CSS
 <style>
 .my-contact-form{
     display: flex;
     align-items: center;
     justify-content: center;
     width: 100%;
 }
 .my-contact-form form{
     width: 100%
 }
 .my-contact-form-label{
     display: block;
     font-weight: 600;
     font-size: 16px;
     color: #07074d;
     margin: 12px 0;
 }
 .my-contact-form-input{
     width: 100%;
     padding: 12px 0px !important;
     text-indent: 10px !important;
     border-radius: 6px !important;
     border: 1px solid #e0e0e0 !important;
     background: white !important;
     font-weight: 500 !important;
     font-size: 16px !important;
     color: #6b7280 !important;
     outline: none !important;
     resize: none !important;
 }
 .my-contact-form-input:focus{
   border-color: #6a64f1 !important;
   box-shadow: 0px 3px 8px rgba(0, 0, 0, 0.05) !important;
 }
 .my-contact-form-btn {
     text-align: center;
     font-size: 16px;
     border-radius: 6px;
     padding: 14px 32px;
     border: none;
     font-weight: 600;
     background-color: #6a64f1;
     color: white;
     width: 100%;
     cursor: pointer;
     margin-top: 12px;
 }
 .my-contact-form-btn:hover {
     box-shadow: 0px 3px 8px rgba(0, 0, 0, 0.05);
 }
 </style>
现在创建一个“thank you”页面
我知道你没明白我的意思。只需按照以下步骤操作即可。
现在创建一个新页面并命名为“谢谢”。
之后复制下面的 HTML 和 CSS 并将其粘贴到代码编辑器中。
现在,发布此页面。
复制此页面 URL 并将其粘贴到我之前给您的 HTML 代码中。
 <div class="content">
   <div class="wrapper-1">
     <div class="wrapper-2">
       <h2 class="thank-you">Thank you !</h2>
       <p>Thanks for email us.<br> We will reply you very soon.</p>
       <a class="button" href="YOUR BLOG URL HERE">Go To Home</a>
     </div>
   </div>
 </div>
 <style>
  @import url('https://fonts.googleapis.com/css2?family=Kaushan+Script&display=swap');
   .pTtl{
     display:none;
   }
     .wrapper-1{
     width:100%;
     height:100vh;
     display: flex;
   flex-direction: column;
       border-radius: 15px;
   }
   .wrapper-2{
     padding :30px;
     text-align:center;
   }
   .thank-you{
       font-family: 'Kaushan Script', cursive !important;
     font-size:4em;
     letter-spacing:3px;
     color:#5892FF ;
     margin:0 !important;
     margin-bottom:20px;
   }
   @media (min-width:600px){
     .content{
     max-width:1000px;
     margin:0 auto;
   }
     .wrapper-1{
     height: initial;
     max-width:620px;
     margin:0 auto;
     margin-top:50px;
     box-shadow: 4px 8px 40px 8px rgba(88, 146, 255, 0.2);
   }
 }
 </style>
不要忘记在 HTML 代码中更改您的主页 URL。
激活邮箱使用
打开您的联系表单。填写表格并提交。您将收到一封激活邮件,邮件地址与您在联系表单中提供的邮箱地址一致。只需激活即可使用。
注意:用户提交后会跳转此页面,如果没有跳转,说明设置失败,请检查修改。
邮箱没有收到激活通知?请在点击一次,一般会两次即可收到。请确保实现了上面的跳转页面。
Ahmedabad


